
Multi-Effects Pi-dle Board

Guitarix- The Pi-dle Board
Note: This is an advanced DIY project. Not recommended for beginners to Raspberry Pi/ DIY electronics projects. Proceed at your own risk. I am not responsible for your actions during this process. This is a very lengthy process. Previous experience with Linux terminal and soldering is recommended
The Dream
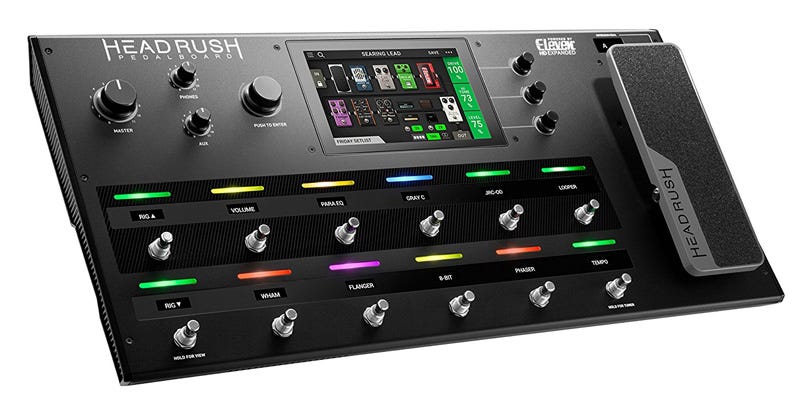
Ever since I first discovered the Raspberry Pi microcomputer, I’ve been fascinated with tinkering with them for projects. For a $35 microcomputer, they are surprisingly robust and powerful and are capable of many different tasks and uses as I’ve mentioned in previous posts. Needless to say, I’ve always wanted to try to build a budget-friendly DIY guitar effects/ amp simulator pedalboard. Similar to other pedalboards on the market, the pedal board would be able to switch between a number of custom programmed effects and tones. Additionally, options such as a volume or expression pedal, and status lights/ displays for each “pedal” could be implemented as time goes on as well. There are many other options on the market such as Boss pedalboards, Kemper amps, or the high-cost Axe-FX system. As with most audio gear, these can drive a high price, making them hard to access. So having just finished my Pi-Hole project and OBVIOUSLY needing another one, I began researching solutions on the raspberry pi platform.
Options Options Options
- Pedal-Pi
- Pure Data
- Csound
- Guitarix
Initially, I discovered the Pedal-Pi, a Raspberry Pi Zero-based single guitar pedal capable of custom pedal effect programming. I might want to follow up with this later, but for my application, I’m looking for more than one programmable effect/pedal. After researching a bit further, it seemed like my main two choices for effects programs would be Pure Data; “a visual programming language developed by Miller Puckette in the 1990s for creating interactive computer music”, or CSound; “ a computer programming language for sound [designed to] synthesize, and manipulate digital audio”. To be honest, I was more than a little intimidated by the lack of options. Both Pure Data and CSound seem to have small niche communities surrounding them, but the software and application were archaic and not very user-friendly.
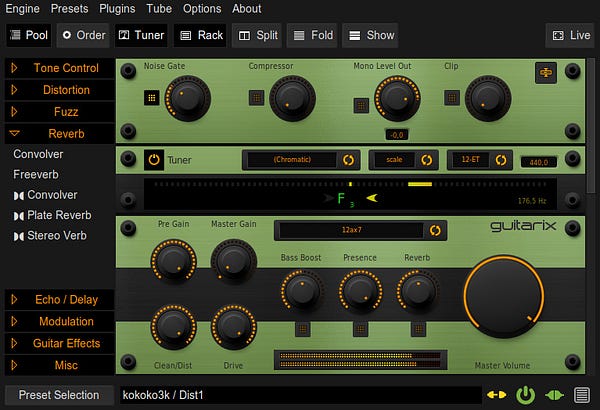
Fortunately, before getting too far down the Pure Data/CSound rabbit hole I discovered Guitarix. Guitarix is “a virtual guitar amplifier for Linux running on Jack Audio Connection Kit.” Guitarix offers a digital rack that is fully customizable and programmable. It even offers simulations of classic pedals, amplifiers, tones, as well as compressors and EQ. In short, you can create and customize your very own unique sound and save it as a preset for later use.
Latency- The Beast of Burden

The largest concern I had when initially researching this project was the CPU processing power and latency limitations of a Raspberry Pi 3b and a USB DAC (Digital to Analogue Converter). Many other projects appear to have used audio interfaces but this would not fit our small pedalboard size restrictions or budget. Luckily, through overclocking and a proper power supply, I was able to get the latency down to about 5ms without too much restriction, which is sufficient.
Tutorial (A General How-To)

Note: This is an intermediate to advanced project. Not recommended for beginners to Raspberry Pi/ DIY electronics projects. Proceed at your own risk. I am not responsible for your actions during this process. This is a very lengthy process.
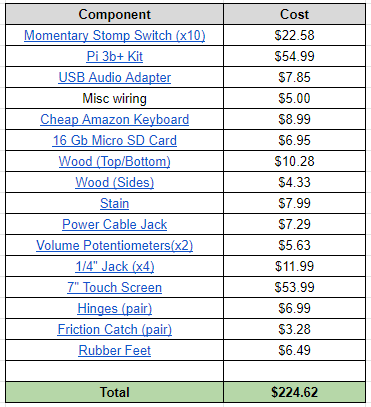
Bill of Materials
Here is also a Google Drive Link with Amazon links attached. The bare minimum cost will is $105 without the enclosure. I tried to keep the pedal as affordable as possible in the spirit of the build, however, you could build this for anywhere from $105–300 depending on your customization options (touch screen, volume pots, power brick, nicer woods…etc)
Phase 1- Set up Raspberry Pi
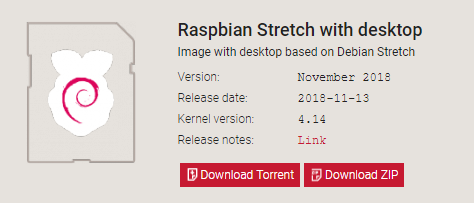
- Download Raspberrian Stretch (Desktop)
- Extract image from zip file
-
Burn Image to SD card via Win32 Disk (Windows) or Balena Etcher (MAC)
- Plug in SD card / peripheral connections to Raspberry Pi and boot up
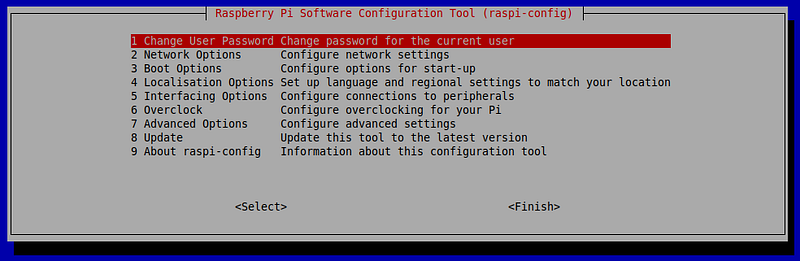
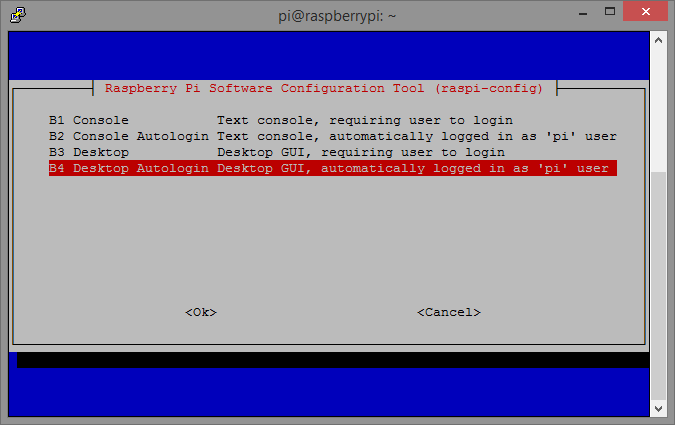
- Connect to local wifi and enable VNC connections with
sudo raspi-configin terminal.
-
Navigate to Interfacing Options and enable VNC connections.
-
Reboot and connect through VNC on desktop/laptop
-
Lastly, change the GPU/ CPU settings to “Overclock” the pi, which will provide maximum performance. (Note: you will need the proper power supply and heat sinks/fans for this step) You may need to tinker with the numbers specifically for your pi. Some can handle 1350 arm_freq, and some can only handle 1000.

NOTE: Steps 5 and 6 are not required but I found that it was easier to remotely configure the Pi (especially since we will eventually be setting it up in ‘headless mode’)
Phase 2 — Guitarix & JACK
Now that you have a Stretch setup in desktop mode we can install Guitarix and Jack. JACK handles the audio input and output connections from the Pi, while guitarix adds the desired effects.
- Connect USB DAC and input/output cables
- Select USB DAC as a primary audio device in sound settings
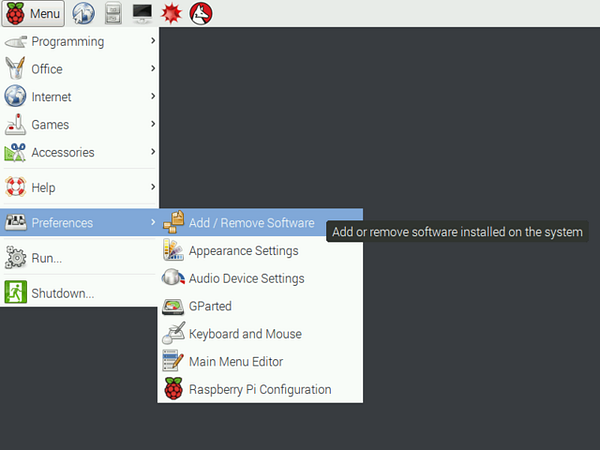
- Go to Preferences →Add/ Remove Software → guitarix
This should download guitarix as well as the Jack Audio Connection Kit (JACK)
- Start guitarix (run desktop icon)
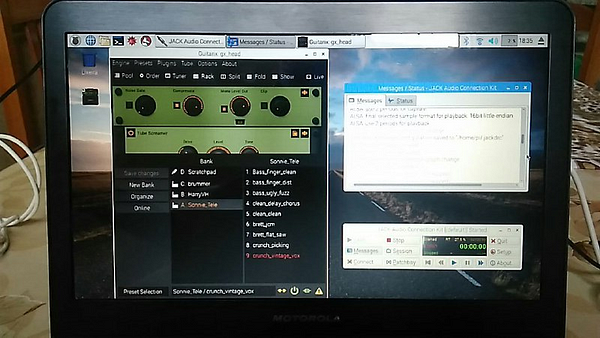
-
This should load up a message that prompts starting JACK Server (since it is not currently running) Click YES
-
You should see something like ←this
-
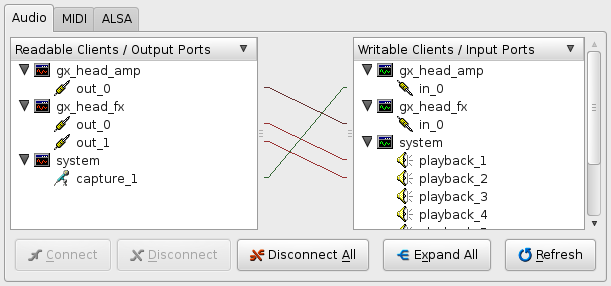
In JACK application window, click “Connect” button and drag connections to reflect below. Capture 1 is your audio in, and playback 1/2 is your audio output.
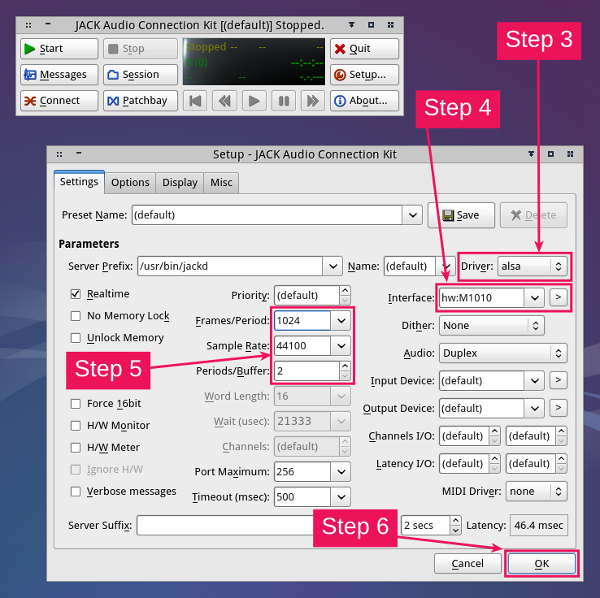
- Navigate to the “Setup…” tab in JACK and match these settings. If these settings are not properly configured, there will be notable latency.
-
Edit Guitarix settings (NEED MORE INFO)
-
You should be able to play through guitarix now
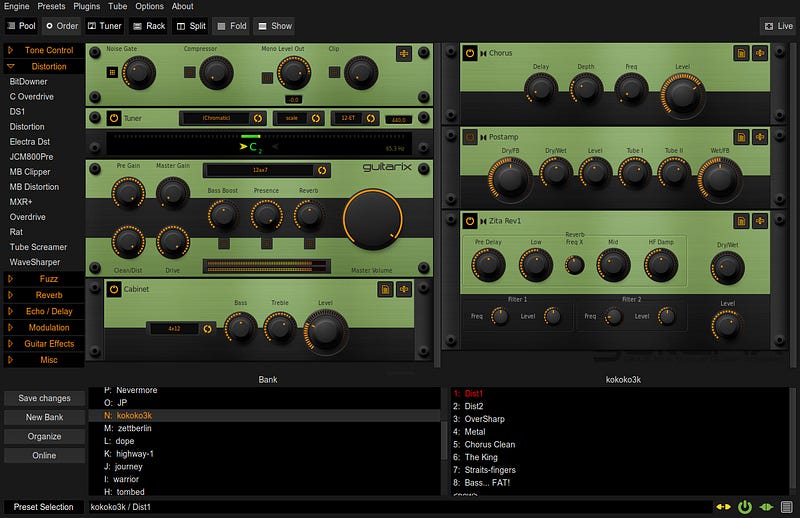
For more information about guitarix see the wiki.
- Once everything is configured and operating to your liking, I would strongly advise creating an image backup through a program like apple pi baker.
Phase 3 — Guitarix/ JACK Autostart On Boot
Now that, we have Guitarix installed on Raspberrian, we need to make our raspberry pi automatically start and run both Jackd for audio, and Guitarix for effects processing upon boot initialization. We can do this with the following steps: (LINK https://raspberrypi.stackexchange.com/questions/8734/execute-script-on-start-up)
- Create a Startup Script (Copy this script for step 2)
pkill jackd
pkill guitarix

/usr/bin/jackd -dalsa -dhw:Device -r192000 -p512 -n2

guitarix
Note: I ended up having to create 2 start-up scripts due to complications. Your mileage may vary
-
Create a file for your startup script and write your script in the file:
-
Copy and paste in your script from Step 1.
-
Save and exit: Ctrl+X, Y, Enter
-
Make the script executable:
-
Register script to be run at startup:
- Auto-login
Next, we will need to ensure that the pi does not get stuck at a login screen during initialization. The simplest way to do so is —
- Finally, reboot your pi
Your pi should boot up, log in, and start Jack and guitarix automatically. You will be able to hear fuzz or your instrument (if plugged in) at this point.
Phase 4 — Preset Switching
There a number of ways we could facilitate the switching of presets and other functions within Guitarix such as using the GPIO (General Input and Output) pins, or homebrewing our own MIDI control, however, due to the inherent difficulty of this project I’ve opted for the simplest option- External Keyboard Encoder.
Luckily for us, Guitarix offers a number of very useful keyboard shortcuts; the most basic being for switching presets with numbers 1–10. So if we can route our momentary footswitches to keyboard numbers 1 -10, then we will have 10 functional switches to navigate between presets.
Ok, how do we do that though…
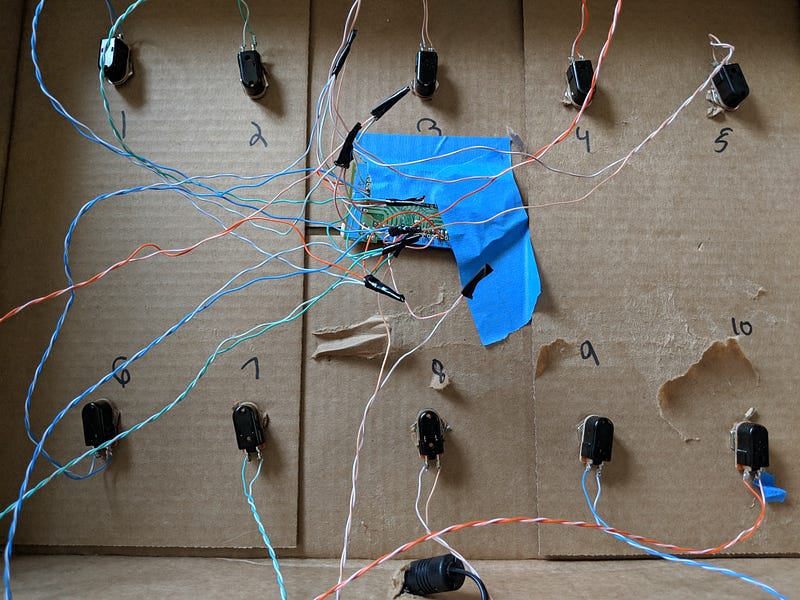
To accomplish this, we will solder directly to the header pins of a wired keyboard, then connect each footswitch to the appropriate header combinations to result in the correct value.
Unfortunately, each keyboard is different, and though there are some helpful guides, we will have to find the correct X, Y header combinations ourselves. What does that mean?

Time to break out our test leads!

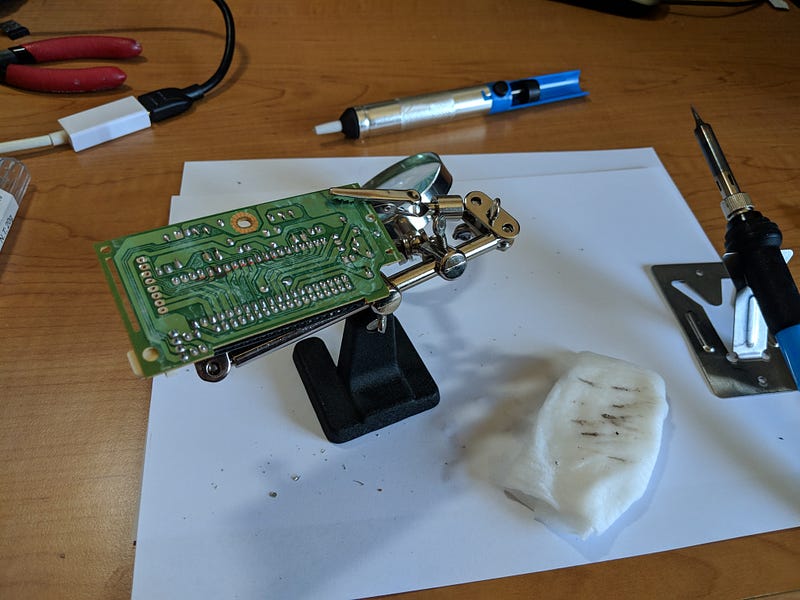
To discover the correct combination of X and Y headers, it is recommended to use a single cable with a test probe as shown above on each end. Plug your keyboard into your computer. Carefully, connect one end to one header pin (X), to another (Y), and see what is typed when you do this. This will take a decent amount of tinkering to find the right combinations to output the values you want.
Here are the combinations for my keyboard —
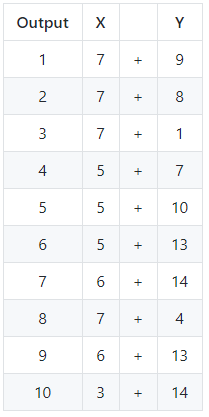
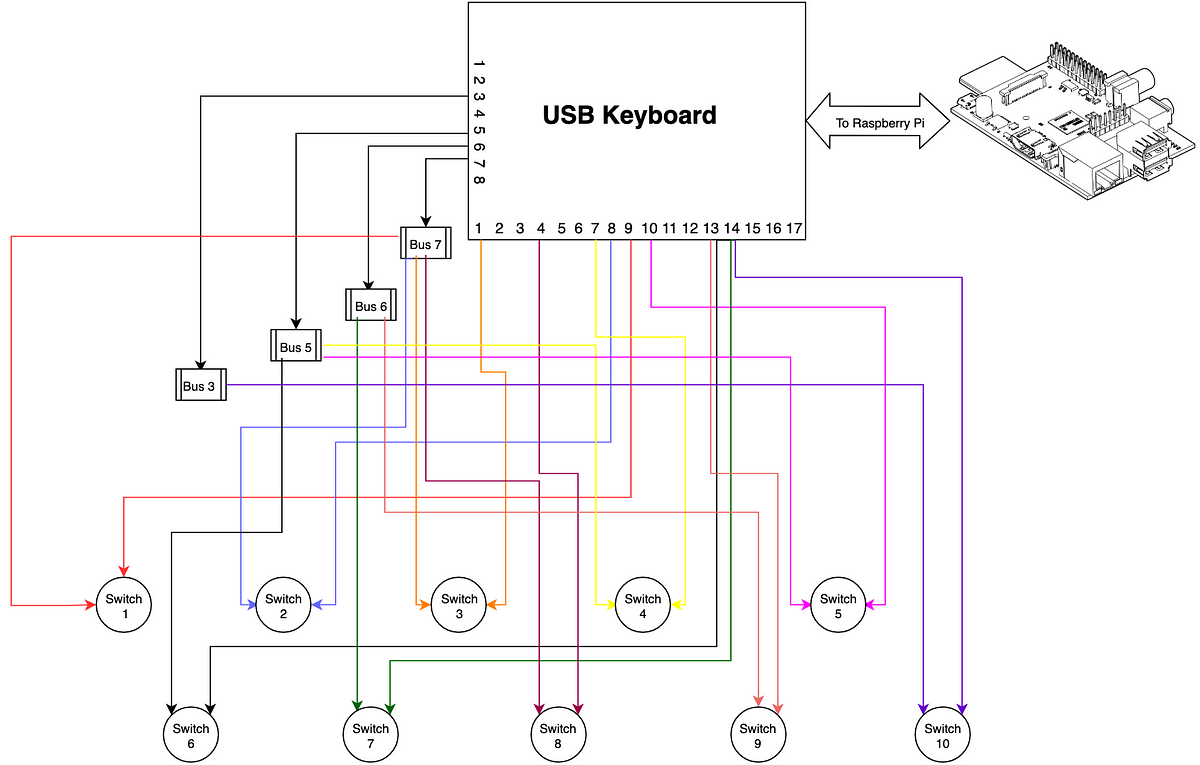
Now that we know the combinations, we simply need to connect each footswitch to the proper headers. For example, per the table above, footswitch 1 would connect to 7 (X) and 9 (Y). Here is a rough diagram I’ve drawn up of the connections.
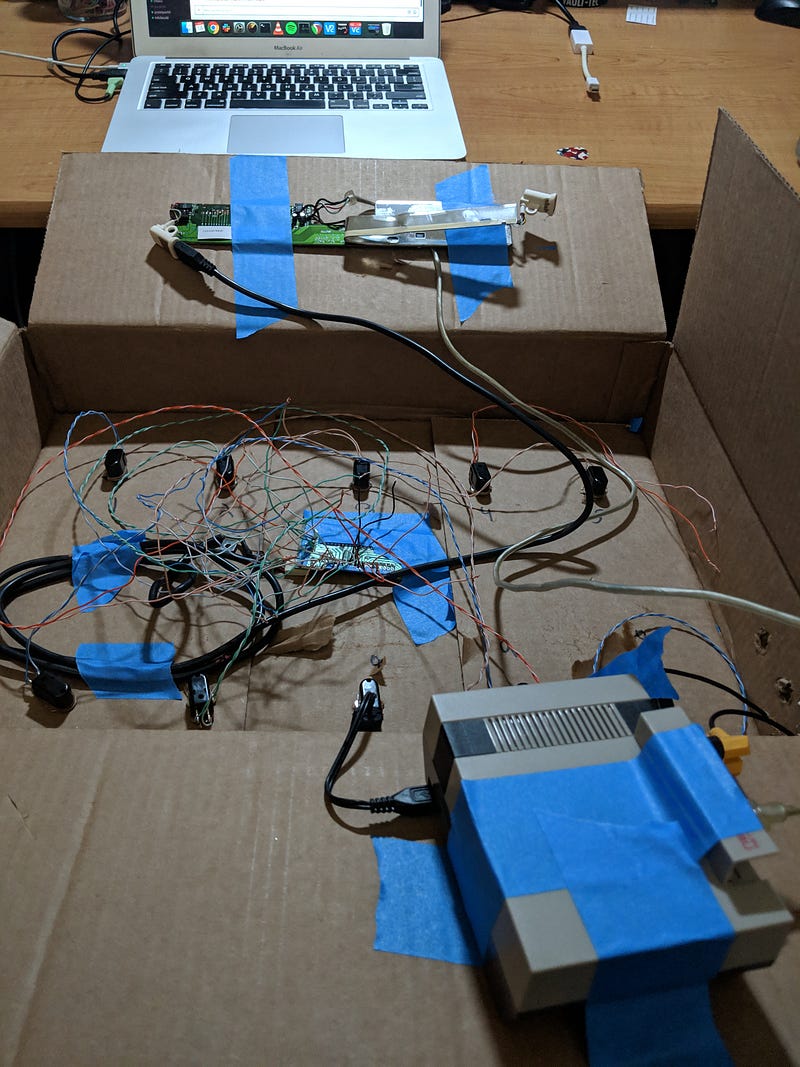
Here is my very messy version of this for my prototype.
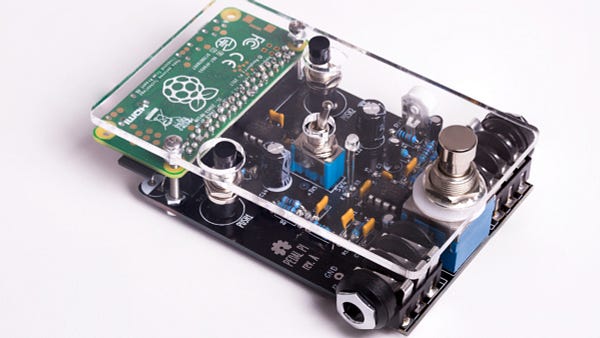
At last, A prototype!
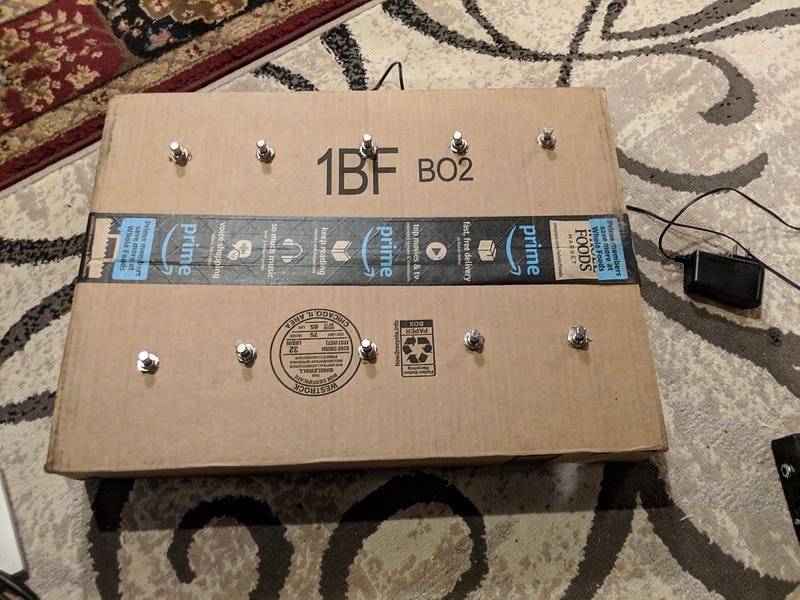
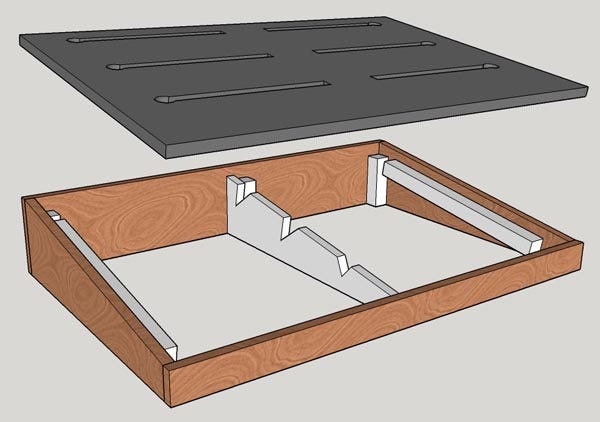
Phase 5 — Building the Enclosure
CURRENTLY IN PROGRESS
I’ve based the enclosure design around a pedal board design from Merwin Music.
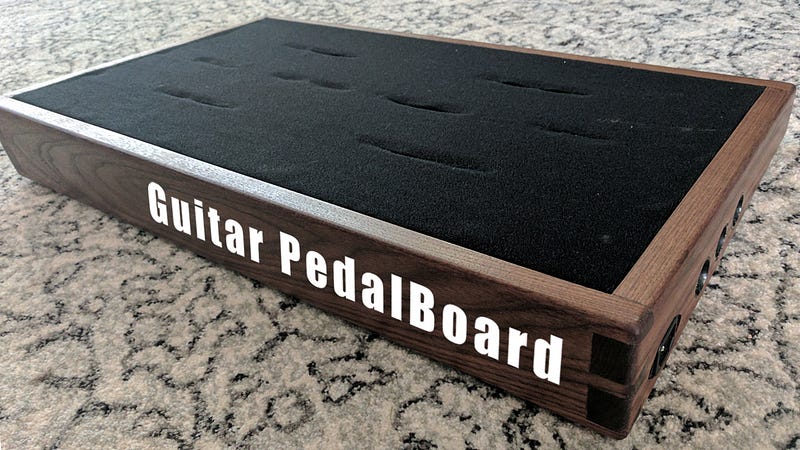
Phase 6— Finalization
IN PROGRESS
New to effects pedals or wanna learn more?
Check out Beginner Guitar HQ for a great introduction to the various effects pedals and their functions.