
Pi-Hole - DNS For Dummies

WTF DNS?
If you’ve been in IT or tech for a minute, you’ve probably heard of DNS. DNS (Domain Name Service) is a key part of IP networking. But if you’re like me, there’s always been a little bit of confusion and uncertainty as to exactly what it is or what it does.

” DNS is the phonebook of the Internet. Humans access information online through domain names, like nytimes.com or espn.com. Web browsers interact through Internet Protocol (IP) addresses. DNS translates domain names to IP addresses so browsers can load Internet resources.” - Cloudflare
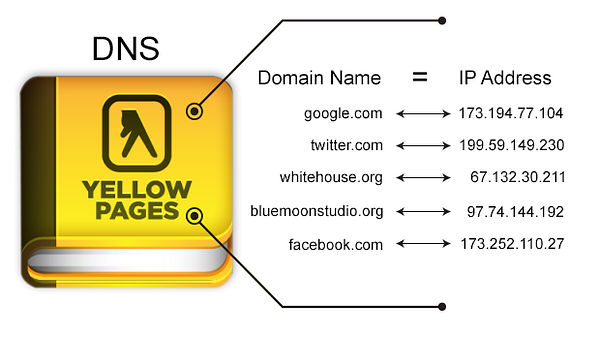
DNS remembers all of the IP addresses so that you don’t have to. As such, DNS will direct your browser where to go so that you can get you the correct web page. But there’s more that happens behind the scenes than the above illustration would depict. There are steps of DNS site resolution -
- Resolving nameserver - Root nameserver - TLD(Top-Level-Domain) name server - Authoritative nameserver.
This video does a great job of explaining the whole DNS process, but specifically the difference between these four DNS steps
A Pie-What?!

A Pi-Hole is a “black hole for internet advertisements” or DNS Sinkhole; in technical terms, which can be installed on many different systems including a Raspberry Pi. Pi-Hole “ protects your devices from unwanted content, without installing any client-side software.”
Simply put, you know that little ad blocker you have installed on your PC’s browser? Imagine that on your entire network. Pi-Hole enables this functionality, which can increase network performance, blacklist risky sites, and protect your privacy.
# Pi-Hole Main Features -Easy-to-install: our versatile installer walks you through the process, and takes less than ten minutes -Resolute: content is blocked in non-browser locations, such as ad-laden mobile apps and smart TVs -Responsive: seamlessly speeds up the feel of everyday browsing by caching DNS queries -Lightweight: runs smoothly with minimal hardware and software requirements -Robust: a command line interface that is quality assured for interoperability -Insightful: a beautiful responsive Web Interface dashboard to view and control your Pi-hole -Versatile: can optionally function as a DHCP server, ensuring all your devices are protected automatically -Scalable: capable of handling hundreds of millions of queries when installed on server-grade hardware -Modern: blocks ads over both IPv4 and IPv6 -Free: open source software which helps ensure you are the sole person in control of your privacy

“Ok, but what does DNS have to do with Pi-Hole” you might be asking. Once installed, the Pi-Hole will serve as your own personal DNS server. In other words, your own personal internet phone book. When you set your home or business router to use your Pi-Hole as it’s designated DNS, Pi-Hole will automatically eliminate ads (or other blacklisted sites) on your network. It does this by not resolving the webpage on the DNS level. In other words, it doesn’t just block ads, it literally won’t even load them.
How Do I Install it?!
Step 1: Connect up your Raspberry Pi
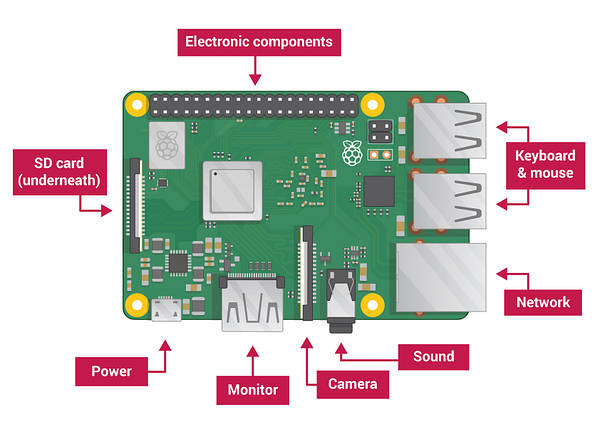
At this step, you will want to do the following…
— connect an ethernet cable to raspberry pi (from the router)
— Connect power cable
— Connect HDMI cable to display/TV
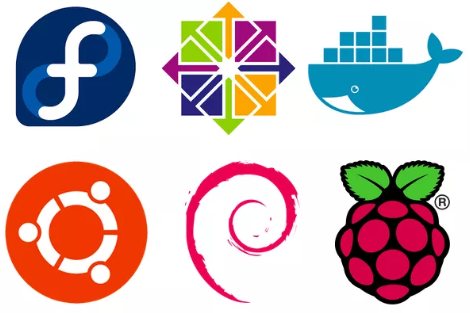
Step 2: Install a supported operating system
Pi-Hole can run on a number of operating systems. I loaded up the latest version of Raspberrian Stretch (a lite Linux based OS for the pi). You will need to download this image, extract it, and burn the ISO image to an SD card using a program like Etcher to fully install Raspberrian on the card.
Step 3: Install Pi-Hole
 You can install Pi-hole from the command line of your OS with this easy one-liner
curl -sSL https://install.pi-hole.net | bash
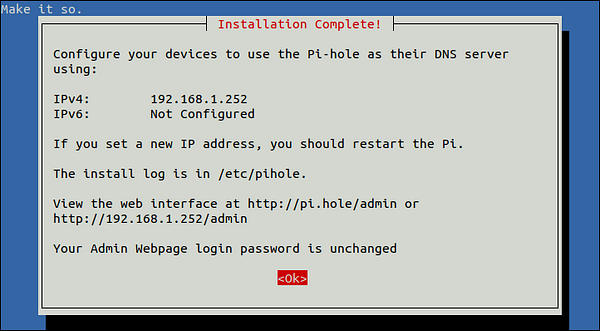
Once you go through all the steps, you should come to a screen as such.
NOTE: I recommend screenshotting this page so that you remember what the IP address is!
There are alternative installation methods as well. There are various youtube tutorials in case you get stuck as well.
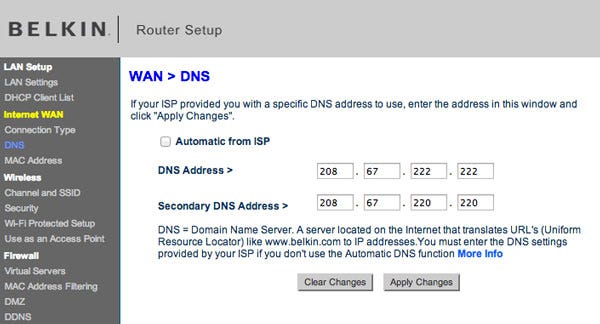
Step 4: Set Pi-Hole as your DNS Server
pic Most home routers will have a DNS section in the configuration menu. Just set the DNS address to the address displayed by your Pi-hole above and you’re golden!
If your router does not provide the option of manually setting the DNS, don’t worry!
You can still block ads, but you will need to manually set the DNS on each device you use.
Step 5: Block Ads On Your Networks.
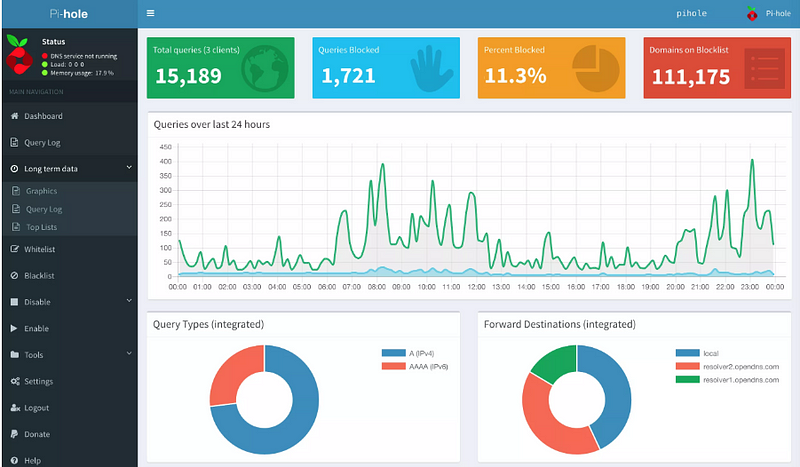 Once you’ve installed pi-hole, you can visit the admin dashboard provided (should be something like http://192.168.1.14/admin) which displays metrics and charts regarding the pi-holes performance. From here you can modify and add whitelists (sites that to permit or not block) or blacklists (sites to automatically block).
You can find much more about Pi-hole at https://pi-hole.net/ or on their documentation page.
What About Sites With Anti-Ad-Blockers?

As you probably know, a number of sites such as Facebook, New York Times, and many others have been starting to deploy “Anti-Ad-Block Technologies”. The infamous “It looks like you’re using an ad-blocker” messages have stopped many users from accessing webpages, so how does the Pi-Hole perform against this tactic?
I personally have not experienced too many issues with these ad-walls after installing the Pi-Hole on my network. However, occasionally it has happened with certain sites. The general consensus within the Pi-Hole community to resolve such issues is to 1. stop visiting that site or 2. Disable javascript on that site (as many Adblock detector programs run java). This can be a huge pain, but it depends on the user really. Keep in mind you can always whitelist these sites (enabling ads) and go on your way as well.
Unfortunately, some sites and services still force ads such as YouTube, Hulu, and other services that do not load ads through DNS, however, a majority of sites and services promote ads through this standard method; so the Pi-Hole should block them just fine for the time being.
Other Fantastic Beasts
Lastly, if you set up a Raspberry Pi similarly to this tutorial, you can run other applications on the pi such as:
— PiVPN (Raspberry Pi based VPN)
— Plex Media Server (to access all your media over your network)
— Samba File Server (to back up and store files)