
PIFX - Part 2 - Electric Boogaloo
In part 1, I showed how my progress of designing and building a prototype pedalboard with a raspberry pi and Guitarix; a Linux based amp/effects simulator. The first version of this project was extremely laborious and overcomplicated. Since my initial post, I have been working on a simpler design that utilizes the raspberry pi’s GPIO pins and Adafruits gamepad keyboard script to switch between Guitarix presets much easier.
This post will detail the developments I’ve made since then as well as the challenges and how I overcame them.
One of the major downsides of my initial prototype of the pedalboard was the complexity and infeasibility of the preset control method. Since Guitarix has pre-programmed keyboard shortcuts for switching between presets, I thought this would be an easy way to switch between presets in a pedal/board version. Just wire the appropriate terminals up to a momentary push button switch and bam, you’ve got preset switching! Right? RIGHT? *I was wrong. I was so wrong. *Using a keyboard as the main interface came with so many issues as detailed in my previous post.
Little did I know; until recently, that there was a *much easier *method right under my nose — GPIO.
GPIO — My New Best Friend
Due to the help of a friend, I became aware of Adafruits “RetroGame” utility; a *“ software glue that links our GPIO-connected controls to “virtual” keyboard input”. *In other words, you can use GPIO to interface your buttons with the raspberry pi, thus controlling an arcade software like RetroPie or RecallBox with arcade buttons or anything else you’d like to control. You can map GPIO pins to a virtual keyboard! This was exactly what I was looking for, and much to my surprise, it was much easier than the USB keyboard method.
To install simply enter these commands into your raspberry pi
cd

curl [https://raw.githubusercontent.com/adafruit/Raspberry-Pi-Installer-Scripts/master/retrogame.sh](https://raw.githubusercontent.com/adafruit/Raspberry-Pi-Installer-Scripts/master/retrogame.sh) >retrogame.sh

sudo bash retrogame.sh
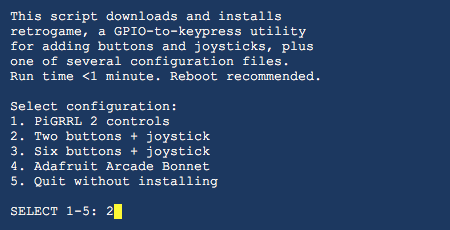
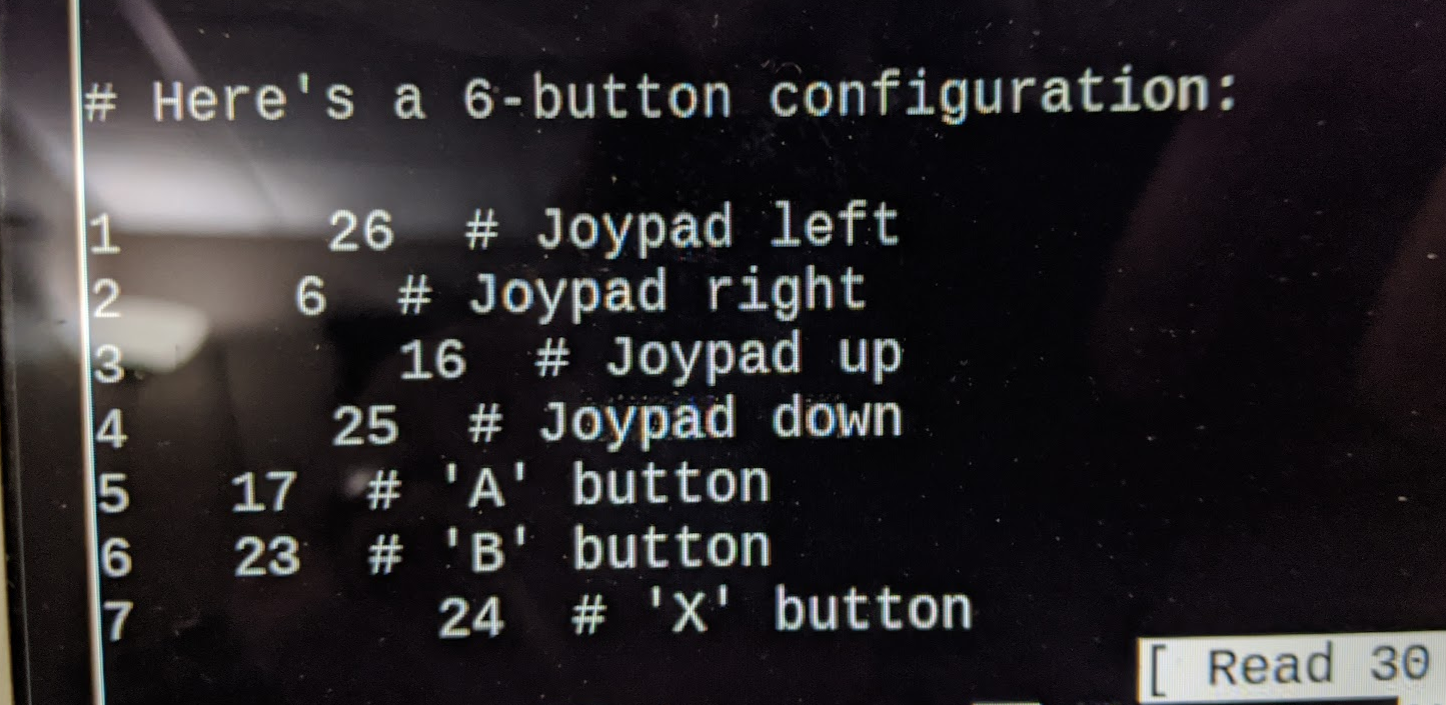
Once entered it will ask you to enter a configuration type. You can use any configuration, but it will ultimately depend on how many buttons you require. I just used #3 “six buttons + joystick”, as it would be plenty of buttons for my pedalboard.
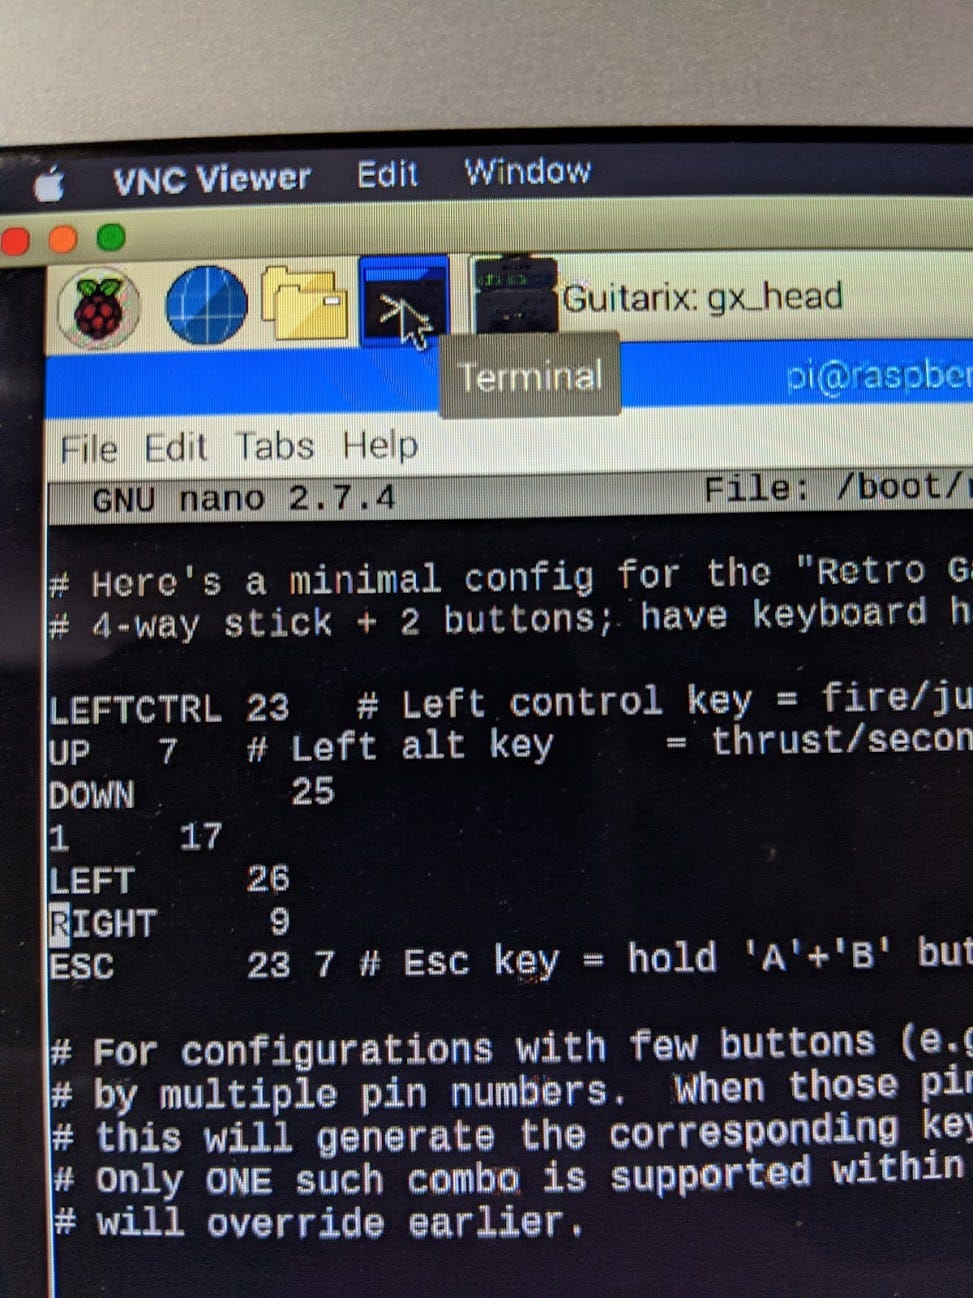
Once RetroGame is installed, we will need to configure the buttons to the various keys and GPIO inputs that we want to use. You can do this “live” by editing the “Retrogame.cfg”. “Live” meaning, you will not be required to reboot the pi after making changes.
Once I had edited the GPIO pin to key values, I tested the buttons.
If the buttons match the key values, then you did it right!
If not, just double-check and make adjustments as needed.
Unexpected Road Blocks
The small compact pedal design hinged on the ability to cycle “Next” and “Back” through the Guitarix presets with an additional button for another function that would be later assigned(Mute audio, tempo tap…etc)
Unfortunately, though what I didn’t account for was how Guitarix would inevitably interpret my “Up”/”Down” commands that I would send to it via GPIO.
Instead of cycling through the presets, it would scroll through a different section of the Guitarix interface. The only way to remedy this was to manually click on the preset section at which point, the Up/Down commands would function as intended.
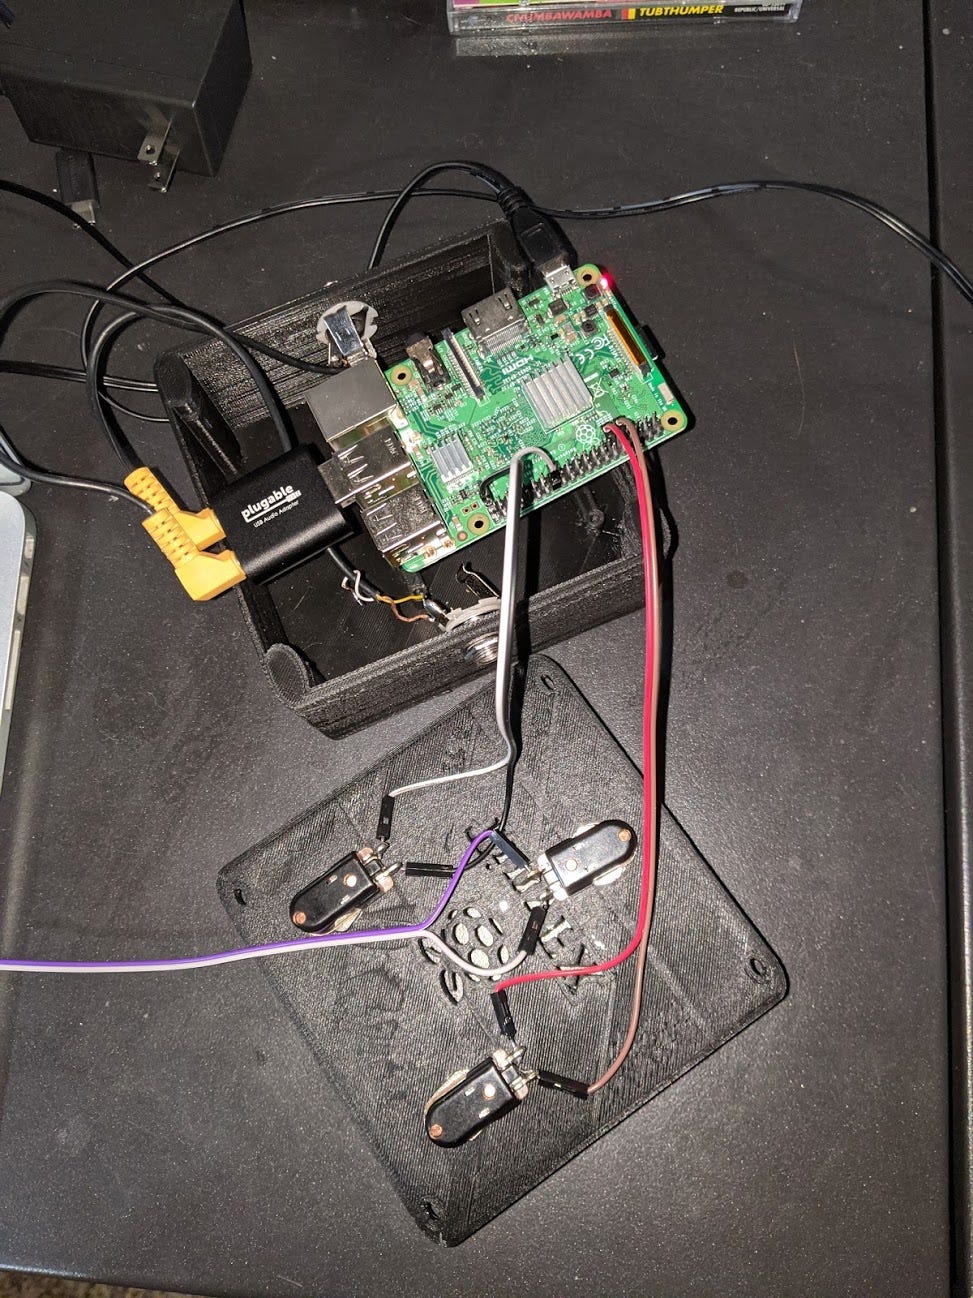
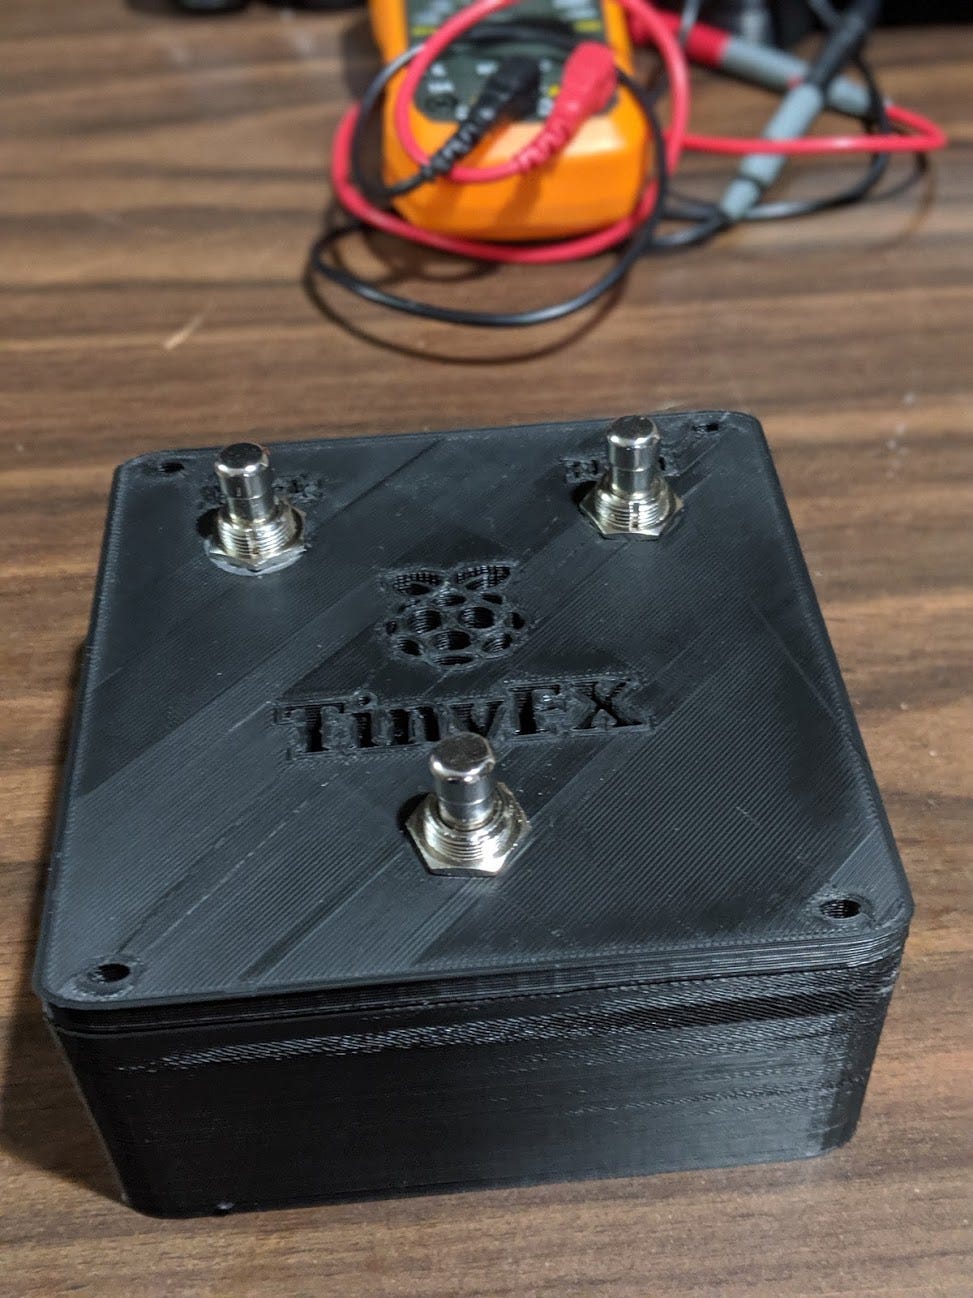
Even worse, I had miscalculated the size of the box that would be required to house the raspberry pi and the USB DAC.
Back to the drawing board. So I turned to the original design. One board, 10 switches, lots of preset combinations
PedalBoard -ASSEMBLE
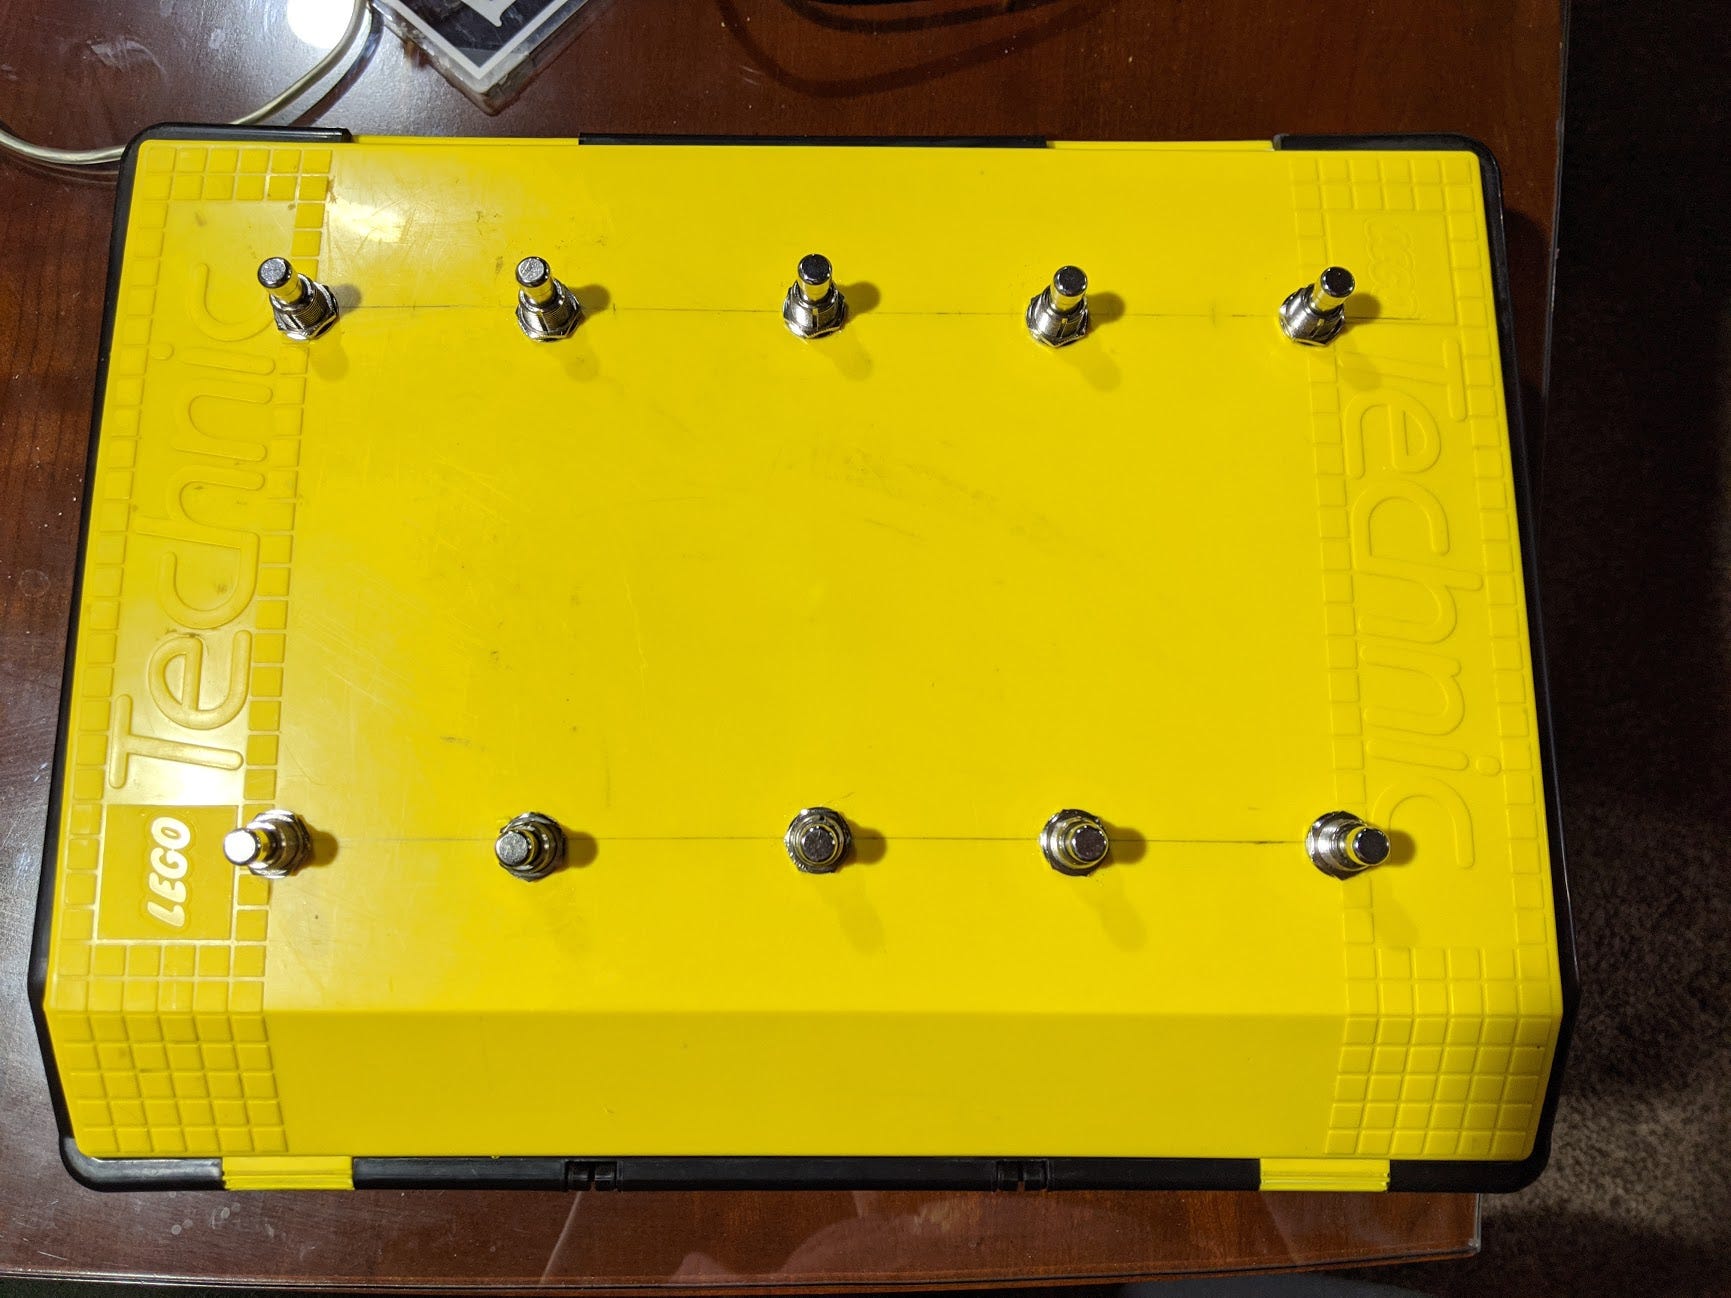
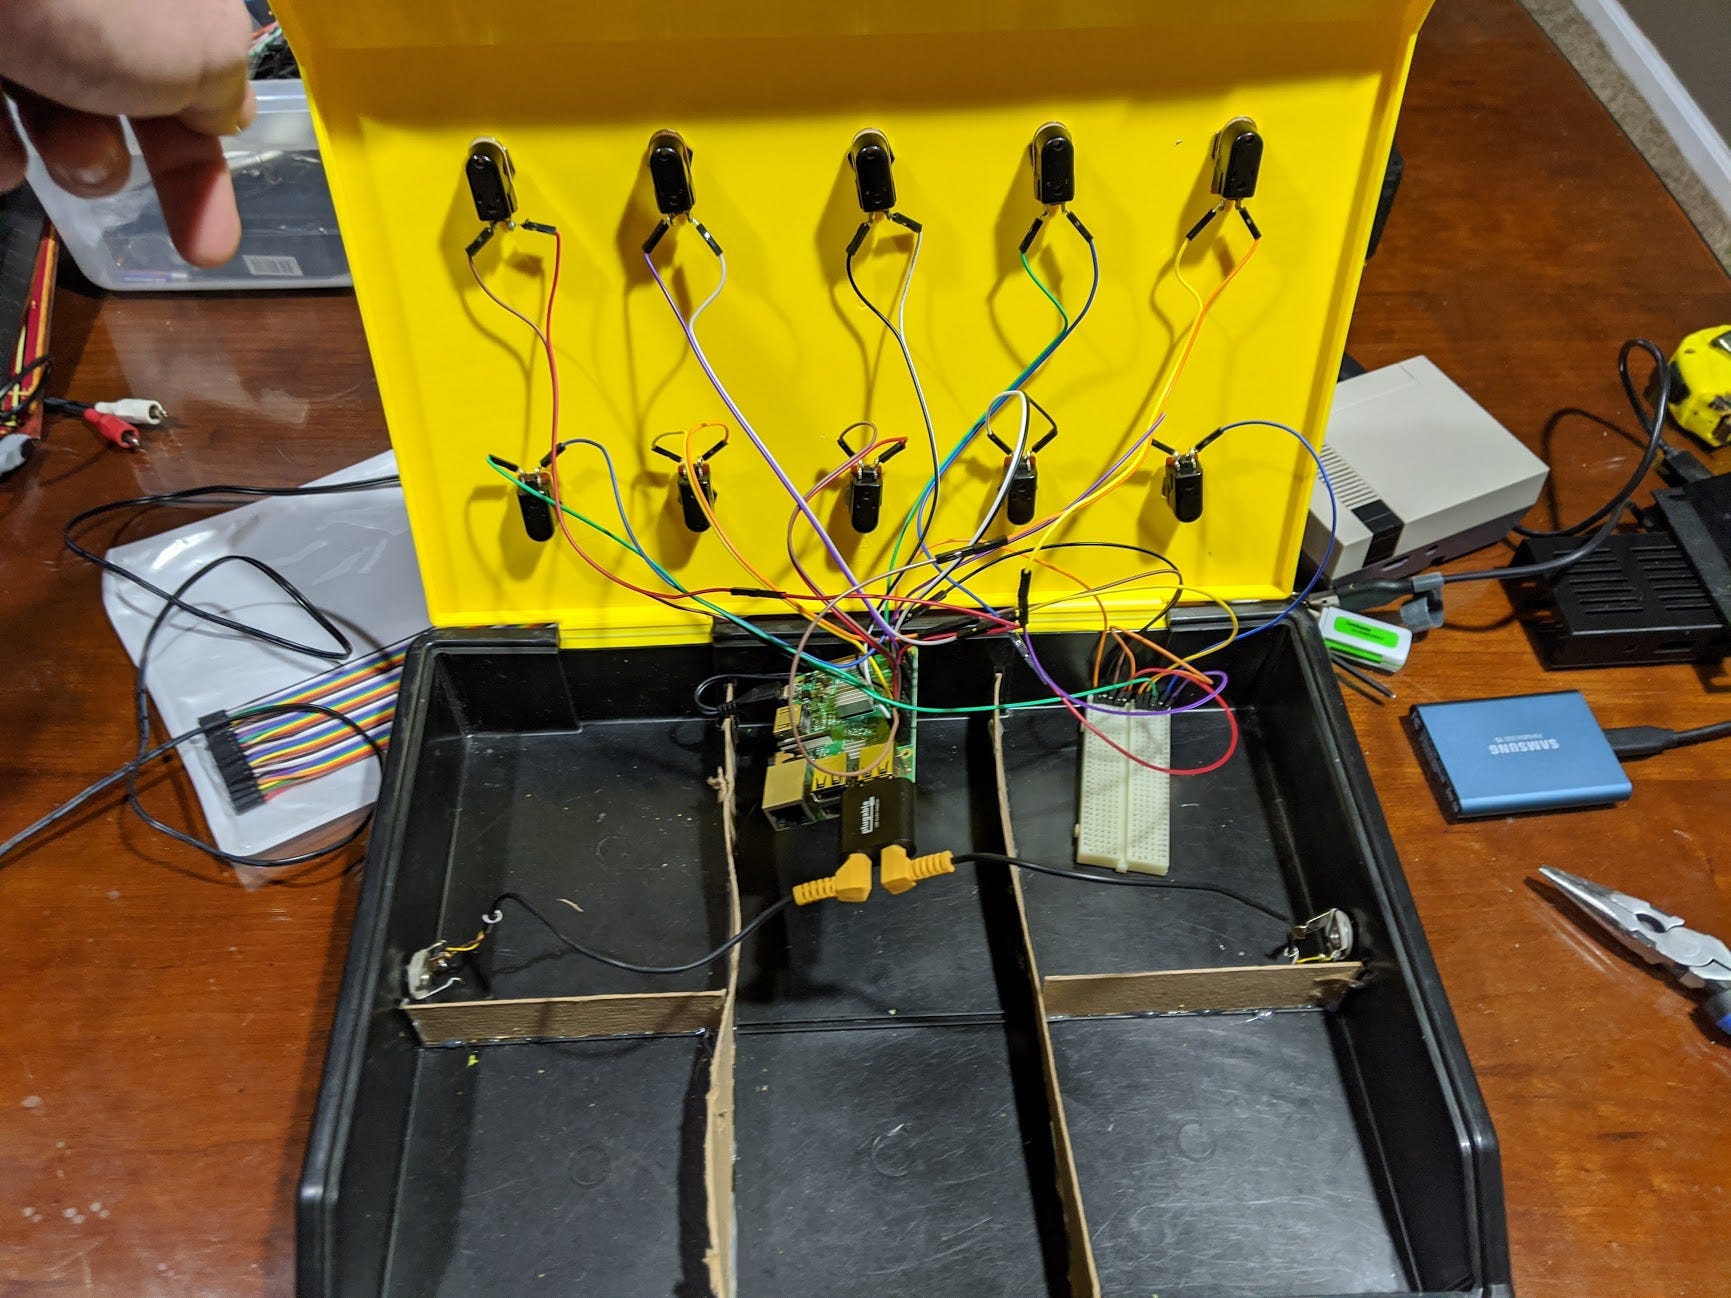
I was able to make use of an old Lego “technic” toolbox I had. It’s a perfect size and shape for a prototype pedalboard, and much cleaner looking than my original cardboard version.
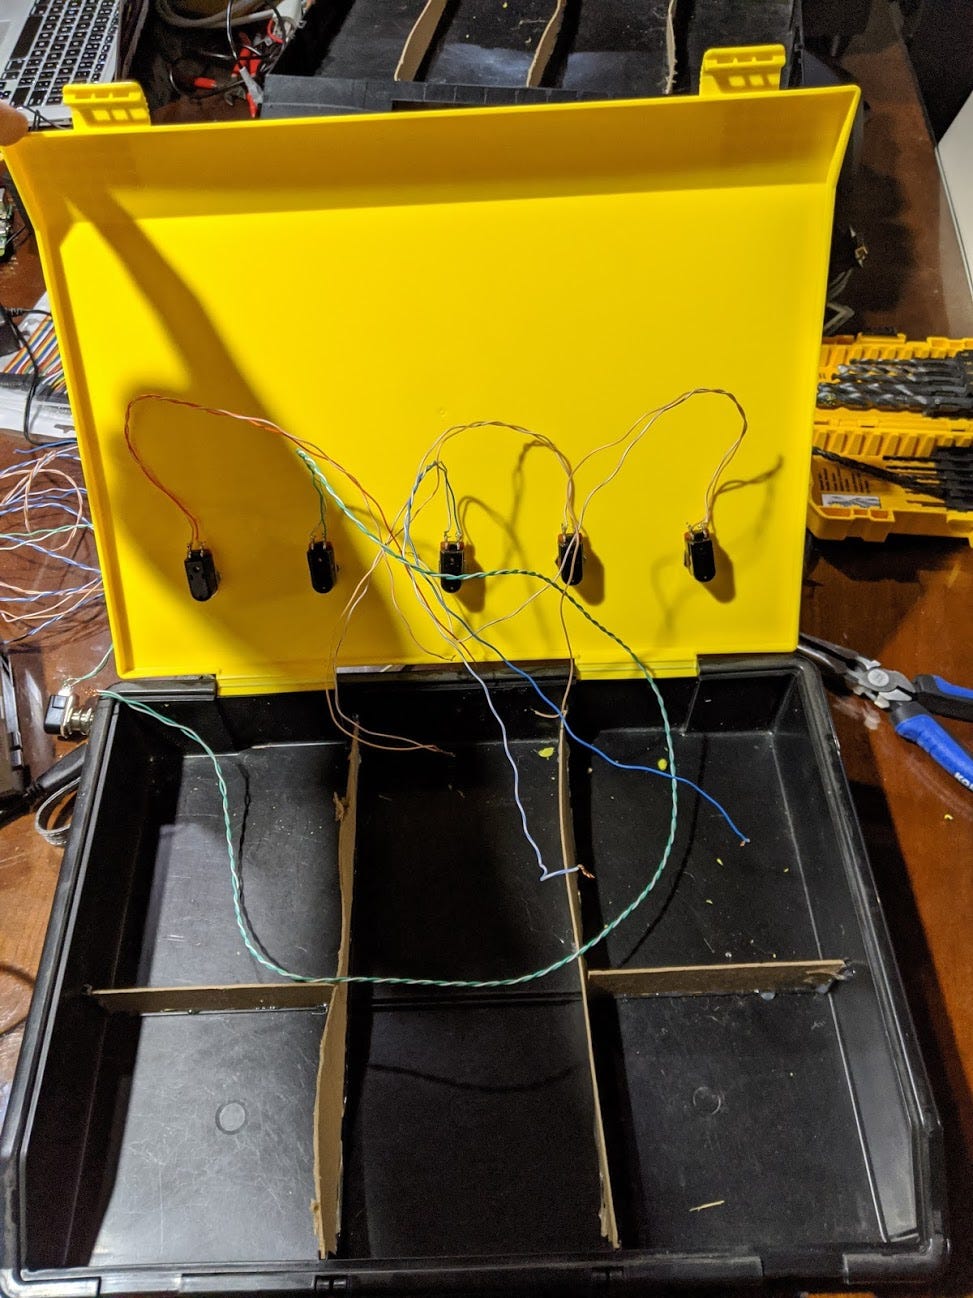
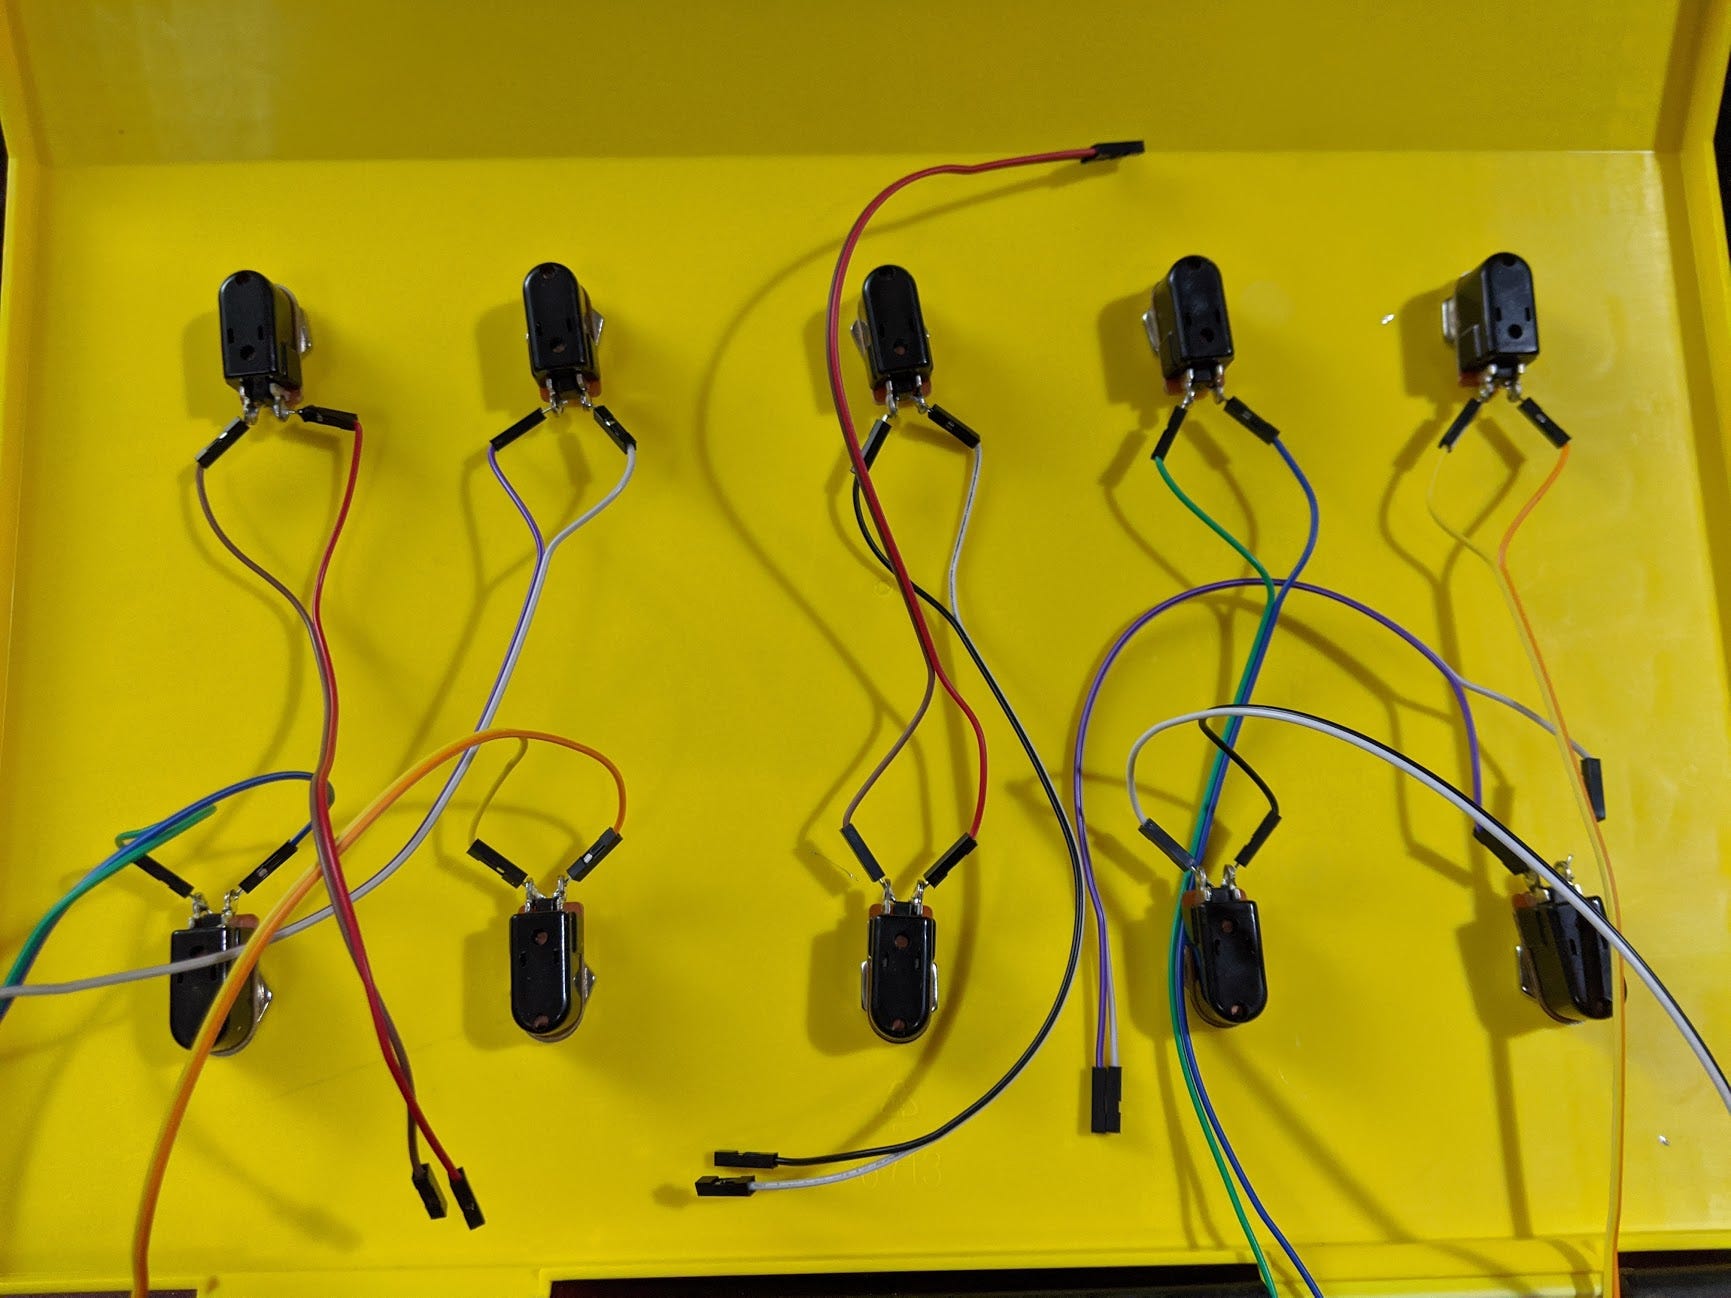
I started by drilling 10 holes for the momentary push switches in the top, then soldering the GPIO quick connect leads to the switches.
Once all 10 holes were drilled, I screwed in the switches and cleaned up the cables a bit.
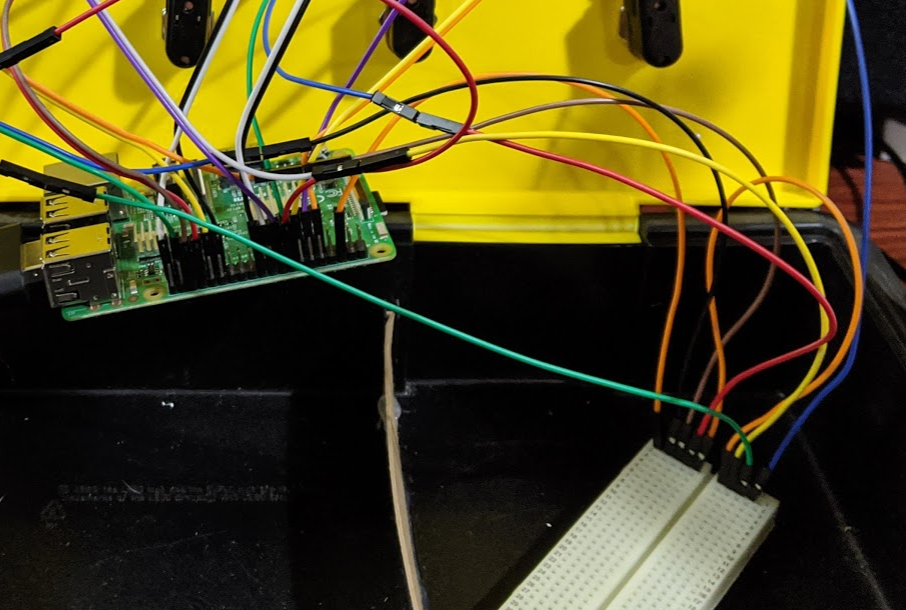
Now time to route everything into the pi’s GPIO pins.
Before we can connect the leads, we need to tell the Pi where we intend to route them. We will reference the RetroGame.cfg file that was previously installed in the step above. If you haven’t already assigned each key and GPIO pin you’ll want to do that now.
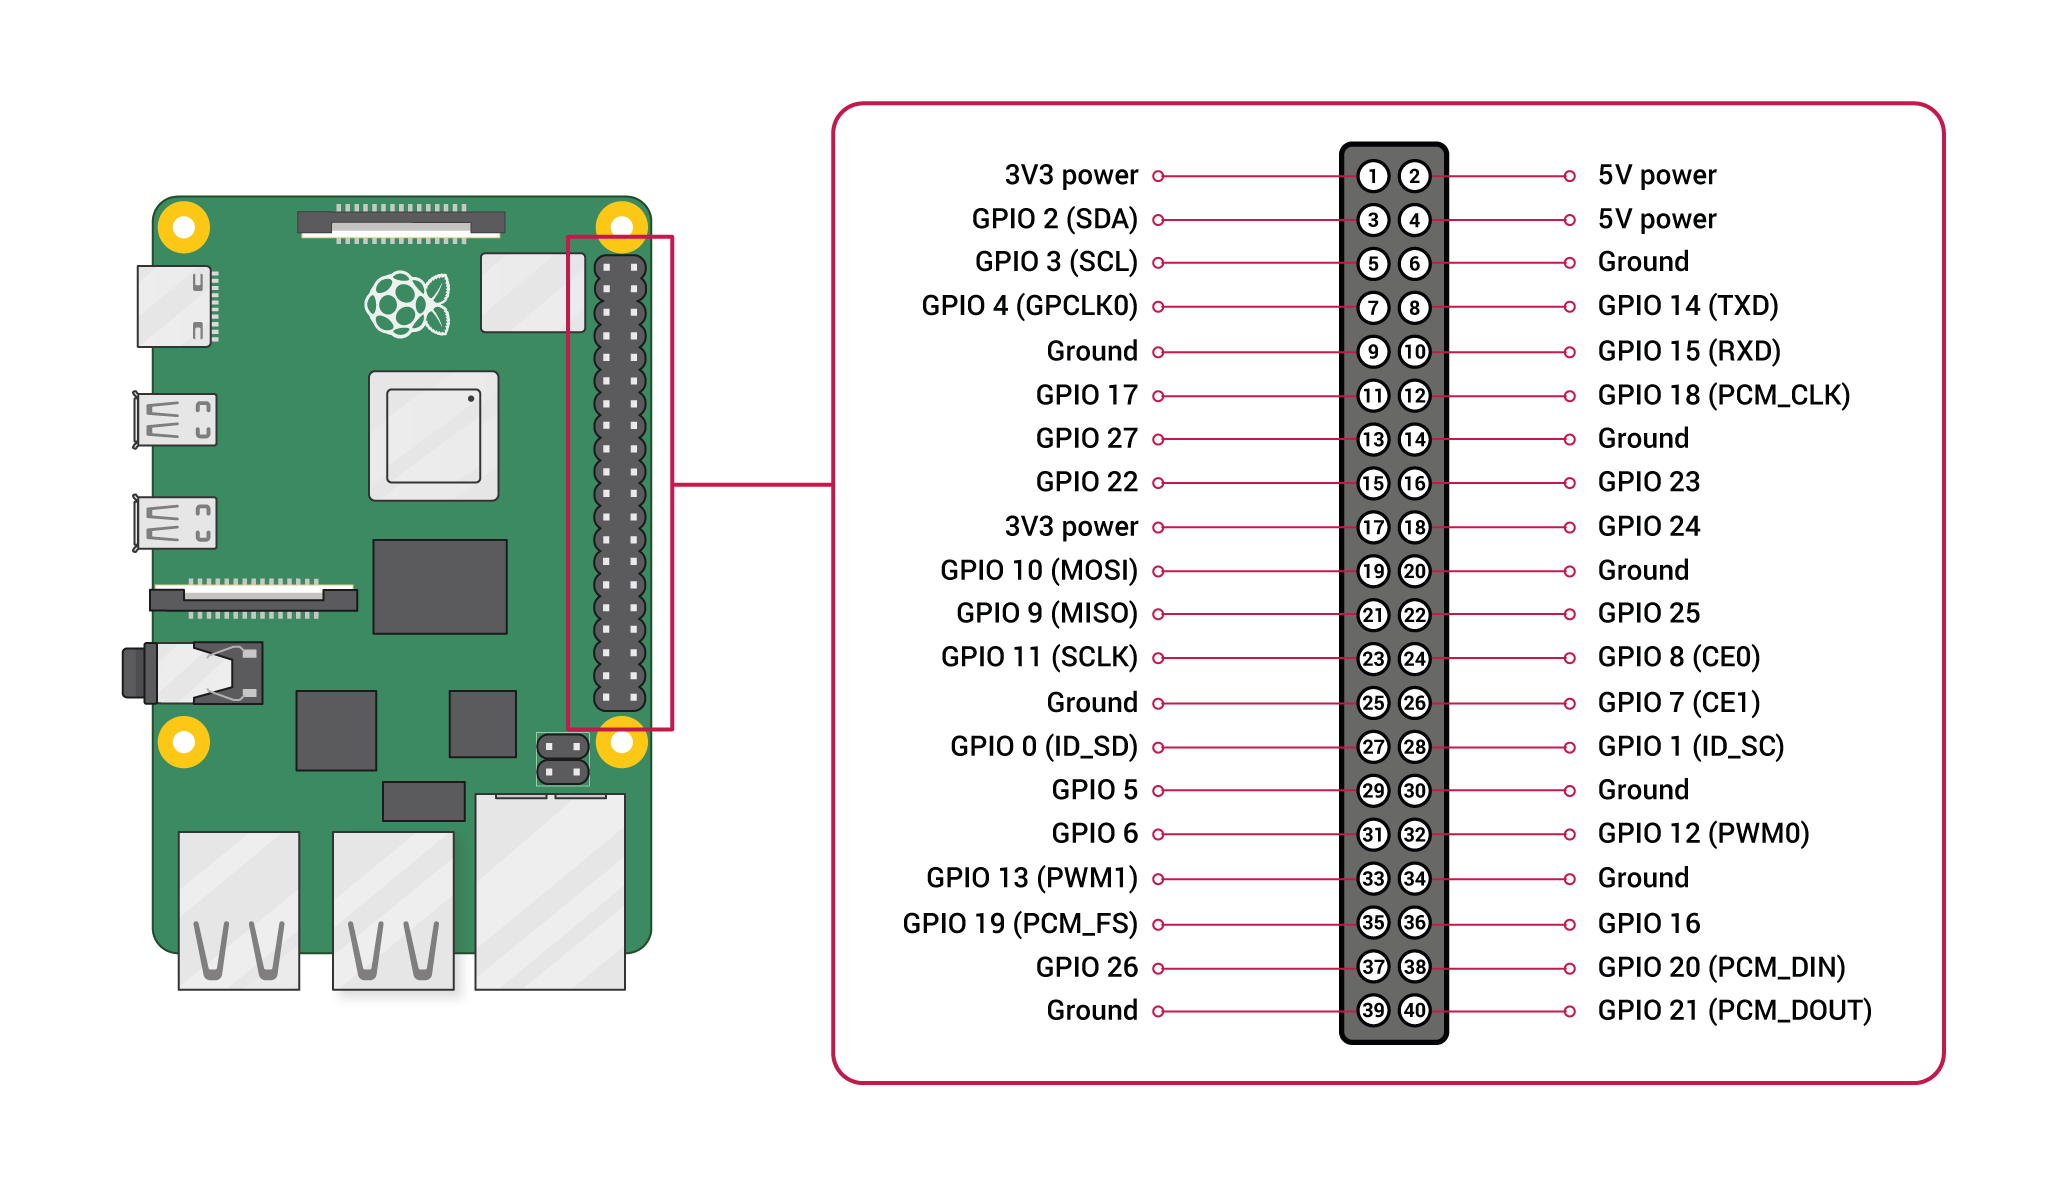
Using the above chart, we can map out a GPIO pin *and *ground pin for each switch we want to install. Some GPIO pins are located close to ground pins, however, we will need a total of 10 grounds, and the pi only has 8 available. As a workaround, we can use a common ground with the help of a breadboard. Simply route an open ground pin to a strip on the breadboard, which will provide more grounds. We could just solder or wire nut everything together, but this will make changes and adjustments that much easier if needed.
Take your time during this step. It’s really easy to get turned around with all the wires going out of your pi. Just double-check your RetroGame.cfg file for reference before testing.
If everything has been properly wired, and configured, you should be able to open up a text document on your pi and cycle between switches 1–10 and “type” each number.
Input /Output
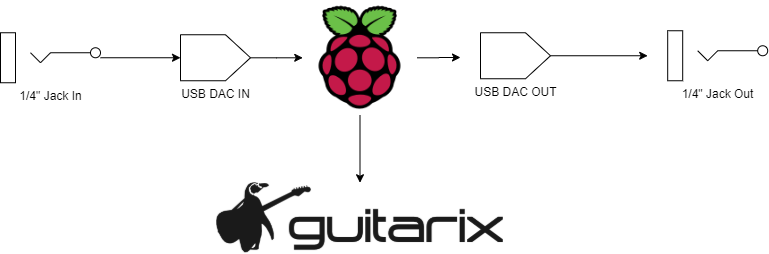
Next, connect your USB DAC. For this project I took an existing 3.5mm M-M cable and cut it in half, dedicating each half to an input/output. Simply solder the wires to the jack.
Below is a simple diagram explaining how the input/outputs are routed.
Modular Design
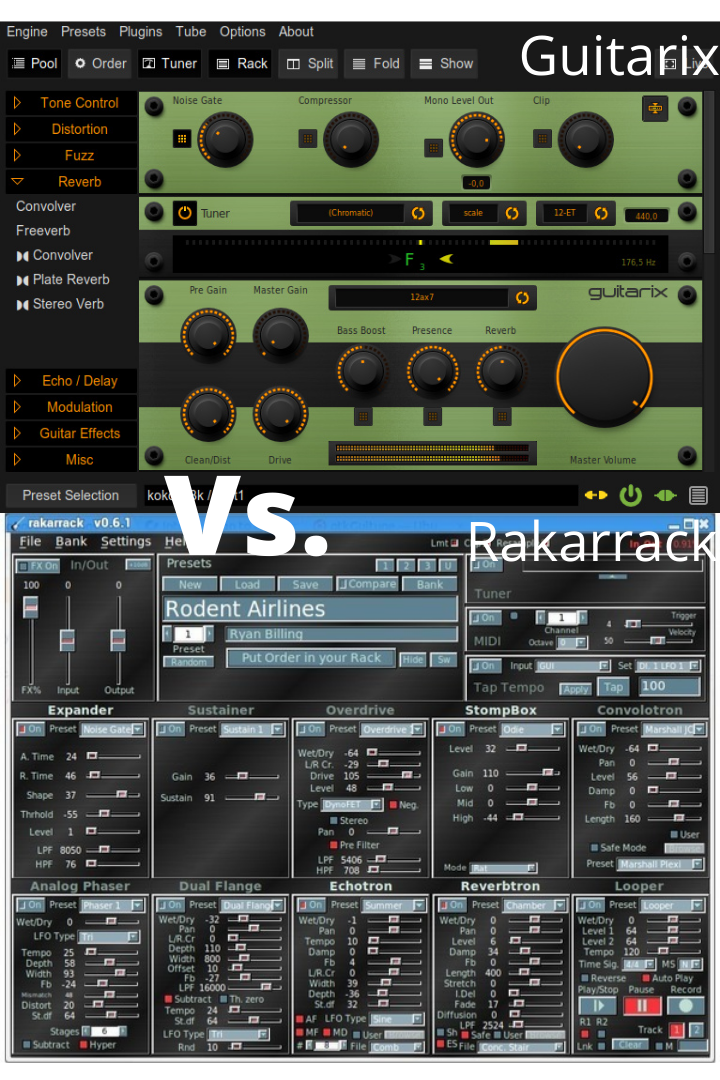
One of the best aspects of using keys 1–10 to switch between presets/ effects is the compatibility of control with multiple programs. Previously I had been using Guitarix as the effects processor, but after playing with Rakarrack for a while, I’ve come to prefer it over the former in this pedalboard application. Whereas Guitarix is more designed around one specific preset with a distinct amp tone, eq, effect…etc, Rakarrack emulates a more traditional pedalboard. In Rakarrack, you can enable any combination of 1–10 effects pedals as opposed to simply switching between presets.
If I ever get bored of one program I can simply edit my startup script to call Guitarix instead of Rakarrack.
Autostart Script
Lastly, you can follow my steps for creating an autostart script in my first post and apply them here. It should be the same or very similar steps to get it automatically starting on boot.
If everything works, you can now tinker around and explore the different effects and combinations within either program.
Demo here: https://www.youtube.com/watch?v=uL7_7cn7PzA
Enjoy!